Valve cover — removal and installation
1. Disconnect the cable from the negative battery terminal (see Engine electrical systems).
2. Remove the individual ignition coil assemblies from the spark plugs (see Engine electrical systems).
3. Remove the Charge Air Cooler (CAC) inlet and outlet tubes (see Fuel and exhaust systems), then remove the CAC bracket fasteners and bracket.
4. Disconnect the electrical connectors for the Variable Camshaft Timing (VCT) solenoids, EVAP canister purge, Fuel Rail Pres- sure (FRP) sensor and the Manifold Absolute Pressure (MAP) sensor.
5. Disconnect the quick-connect fittings on the crankcase vent tube and brake vacuum tube and remove the tube then, disconnect any vacuum lines and retainers.
6. On 2019 models, remove the high-pressure fuel pump (see Fuel and exhaust systems).
7. On 2019 models, remove the coolant tube bracket bolt from the valve cover then remove the coolant tube fitting bolt and pull the fitting from the cylinder head. Inspect the 0-ring on the tube fitting and replace as necessary.
8. Remove the bracket for the wiring harness on the valve cover stud, then set the harness aside.
9. Remove the engine oil dipstick.
10. Working progressively, unscrew the valve cover retaining fasteners, noting the captive spacer sleeve and rubber seal, then detach the cover.
11. Discard the cover gasket. This must be replaced whenever it is disturbed. Check that the sealing faces are undamaged and that the rubber seal at each bolt hole is serviceable. Replace any worn or damaged spark plug tube seals or Variable Camshaft Timing (VCT) solenoid seals.
Installation
12. On installation, clean the cover and cylinder head gasket faces carefully. Install a new gasket onto the valve cover, ensuring
that it is located correctly by the rubber seals and spacer sleeves.
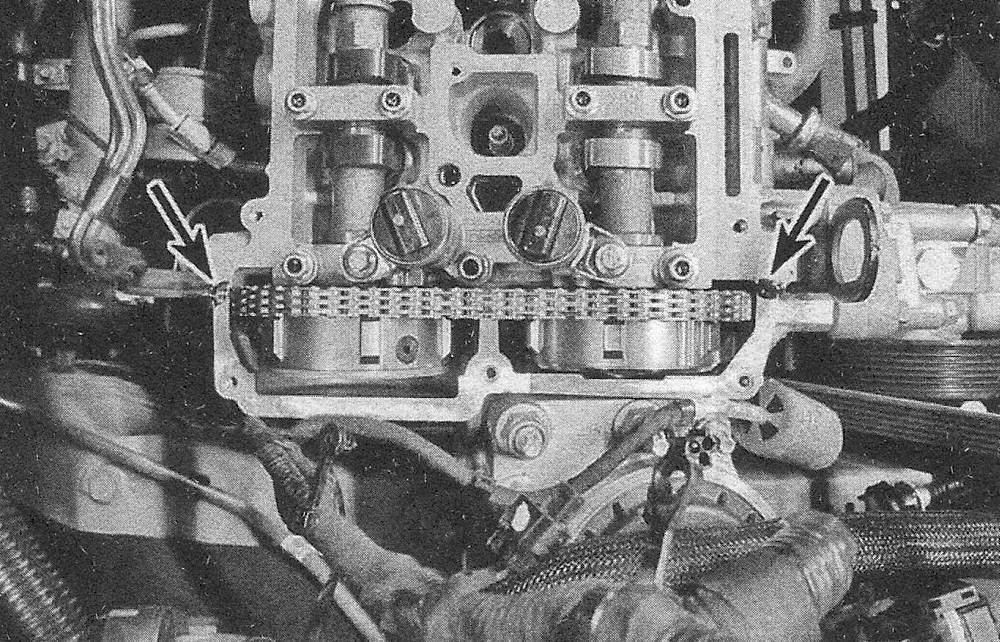
13. At the top of the timing chain cover, apply a small bead of RTV sealant to the joints where the timing chain cover meets the cylinder head (see illustration).
4.13 Apply a bead of RTV sealant to the joints where the timing chain cover meets the cylinder head

14. Install the cover to the cylinder head, ensuring that the gasket remains seated as the cover is tightened.
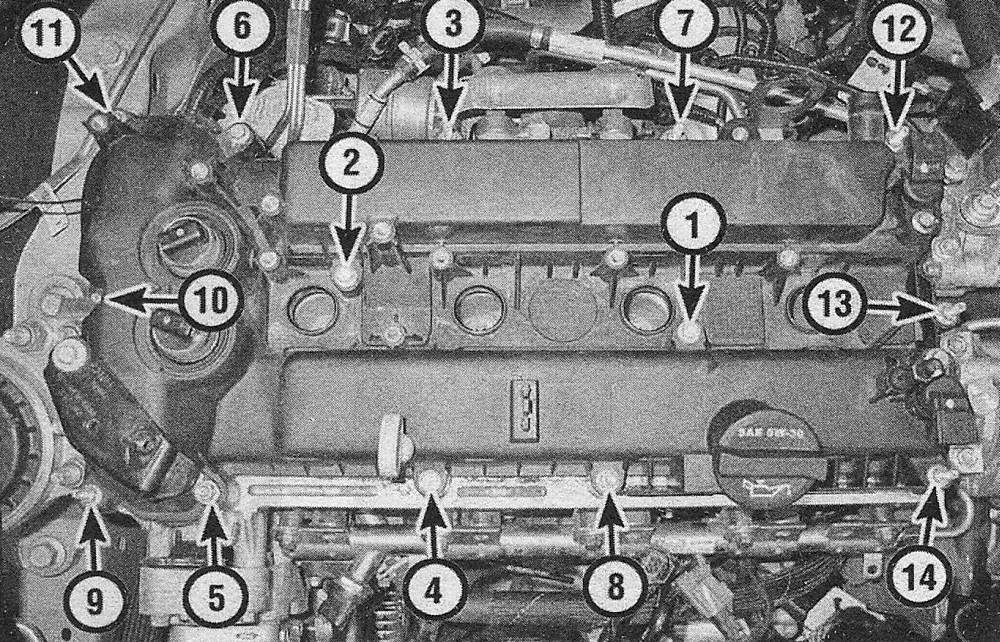
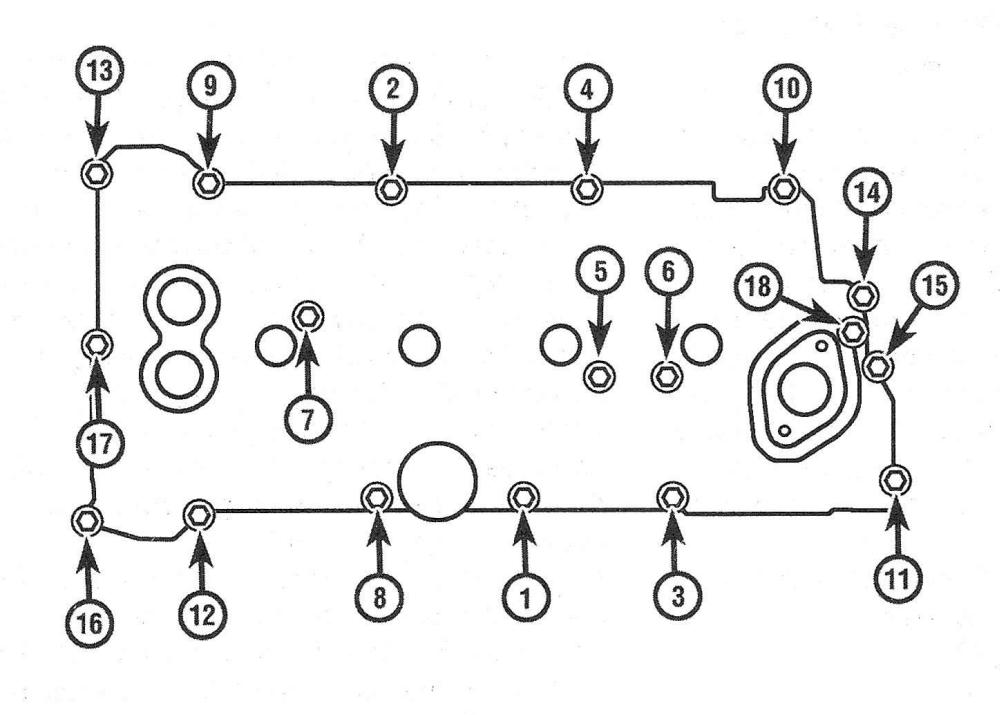
15. Tighten the cover bolts, a little at a time in sequence (see illustrations), to the torque listed in this Chapter Specifications.
4.15a Valve cover bolt tightening sequence — 2018 and earlier model shown

4.15b Valve cover bolt tightening sequence — 2019 2.0L engine

16. Reconnect the battery.
17. Run the engine and check for signs of oil leakage.