Valve covers — removal and installation
Removal
1. Disconnect the cable from the negative battery terminal (see Engine electrical systems).
2. Remove the engine cover, if equipped.
3. Remove the ignition coils from the cover to be removed (see Engine electrical systems).
2.7L engine
4. Disconnect the quick-connect fittings from both ends of the PCV tube and disconnect the crankcase pressure sensor electrical connector.
5. Loosen the clamps, then remove the left- hand air filter housing outlet pipe.
6. Loosen the clamps, then remove the Charge Air Cooler (CAC) outlet pipe (see Fuel and exhaust systems).
7. Remove the throttle body (see Fuel and exhaust systems).
8. Remove the purge valve hoses and valve, then move the harness out of the way (see Fuel and exhaust systems).
9. Remove the ground wire mounting bolt and reposition the wire out of the way.
10. Remove the various electrical and vacuum harness retainers and electrical connect- tors that may be in the way and reposition them out of the way.
11. Remove the turbocharger boost solenoid mounting bolts and move the solenoid assembly out of the way.
12. Remove the oil dipstick from the valve cover.
3.5L and 3.7L engines
13. Remove the oil dipstick from the valve cover.
14. Disconnect the vent tube from the valve cover (see illustration).
4.14 Detach the vent tube from the

15. Disconnect the wiring harness from the valve cover and position it off to the side. Remove the engine oil dipstick.
16. Disconnect the oxygen sensor connector and fuel injector electrical connectors.
Rear valve cover 2.7L engine
17. Remove the cowl panel (see Body).
18. Loosen the clamps then remove the right-hand air filter housing outlet pipe.
19. Loosen the clamps then remove the Charge Air Cooler (CAC) intake pipe (see Fuel and exhaust systems).
20. Disconnect the quick-connect fittings from both ends of the PCV tube and remove the tube.
21. Disconnect the electrical connectors to the PCM (see Emissions and engine control systems).
22. Remove the various electrical, vacuum harness retainers and electrical connectors that may be in the way and reposition them out of the way.
3.5L and 3.7L engines
23. On 2014 and earlier models, remove the power steering fluid hose retainers and move the hose out of the way.
24. Disconnect the oxygen sensor (HO2S) and catalyst monitor sensor (CMS) connectors and the fuel injector electrical connectors.
Each valve covers
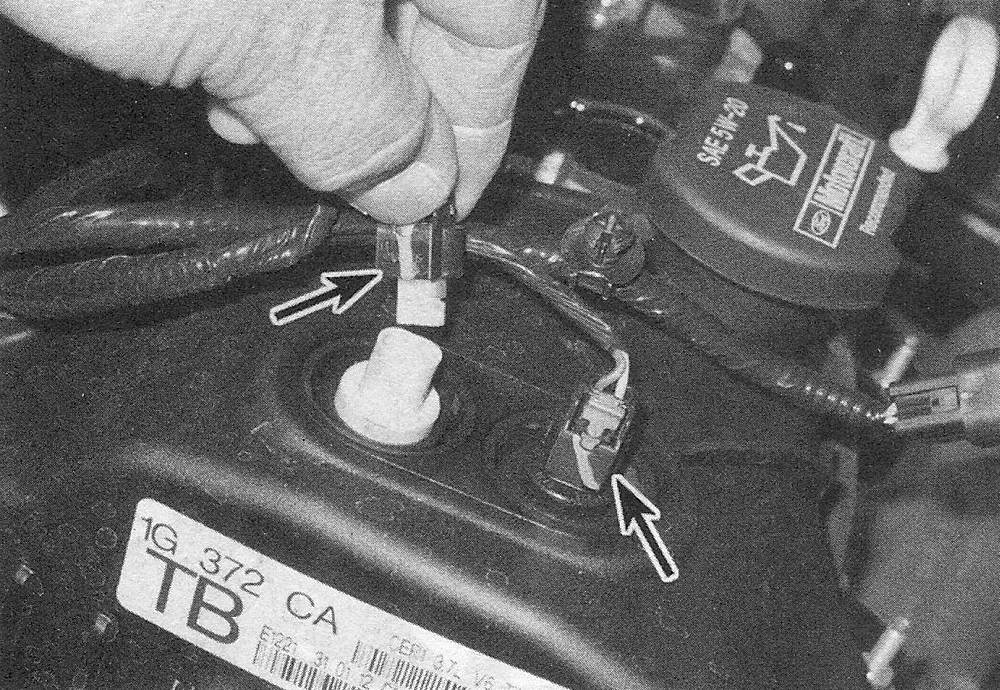
25. Disconnect the two electrical connectors at the valve cover for the VCT solenoids, being careful not to twist the solenoids (see illustration).
4.25 Disconnect the electrical connectors from the VCT oil control solenoids in each valve cover
26. Remove the valve cover fasteners, then separate the wiring/clips and remove the valve cover from the cylinder head (see illustration). Use hand-pressure to wiggle the valve cover from the cylinder head.
4.26 Valve cover fasteners
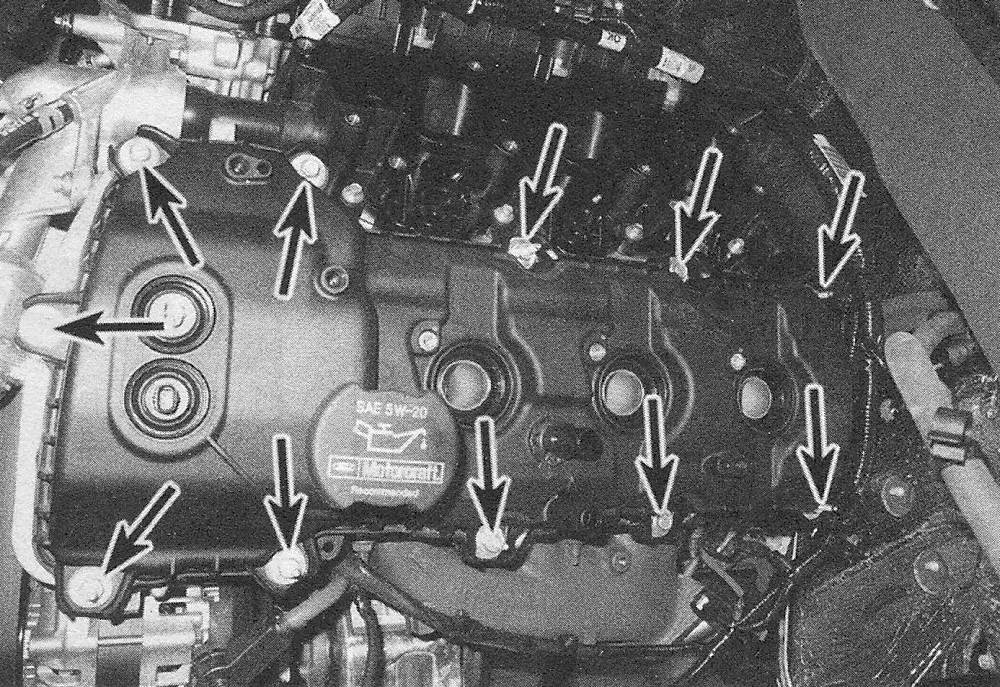
Caution: If that doesn’t work, do not use a hammer. Try to slip a flexible putty knife between the cylinder head and cover to break the gasket seal. Don’t pry at the cover-to-cylinder head joint or damage to the sealing surfaces may occur (leading to oil leaks in the future).
Installation
27. The mating surfaces of each cylinder head and valve cover must be perfectly clean when the covers are installed. Remove all traces of sealant and old gasket material, then clean the mating surfaces with brake cleaner. If there’s sealant or oil on the mating surfaces when the cover is installed, oil leaks may develop.
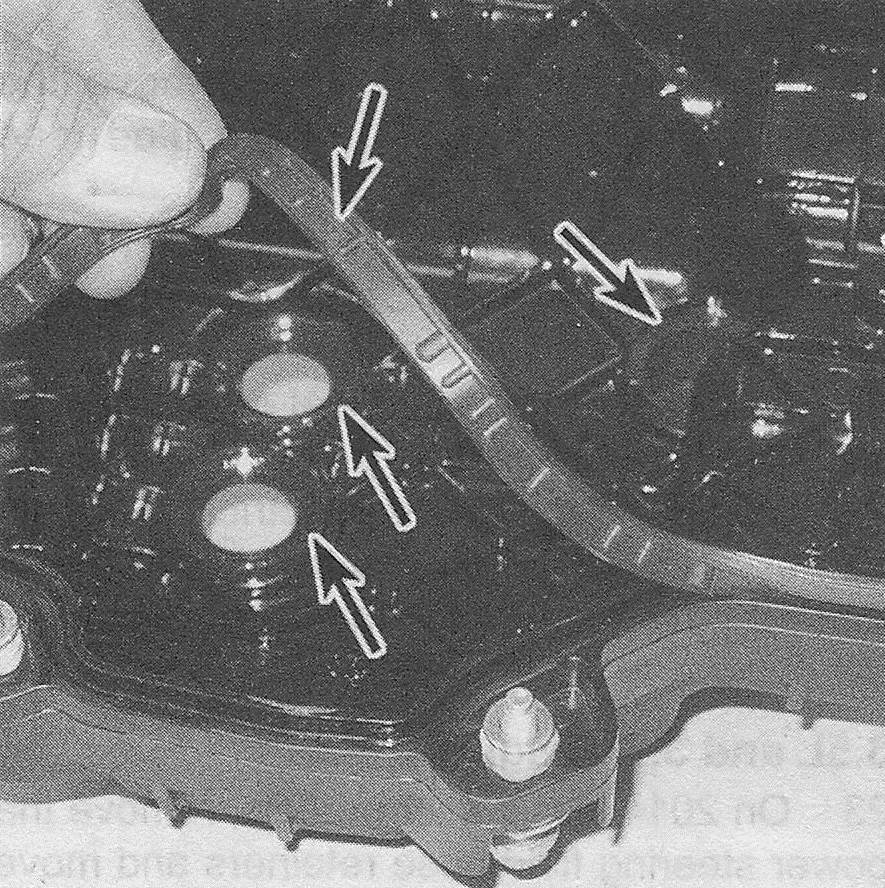
28. Inspect the spark plug seals, the seals for the VCT solenoids and the valve cover gasket (see illustration). Do not replace them unless necessary.
4.28 Check the spark plug tube seals, VCT solenoid seals and valve cover gasket. If they are in good condition, they can be reused
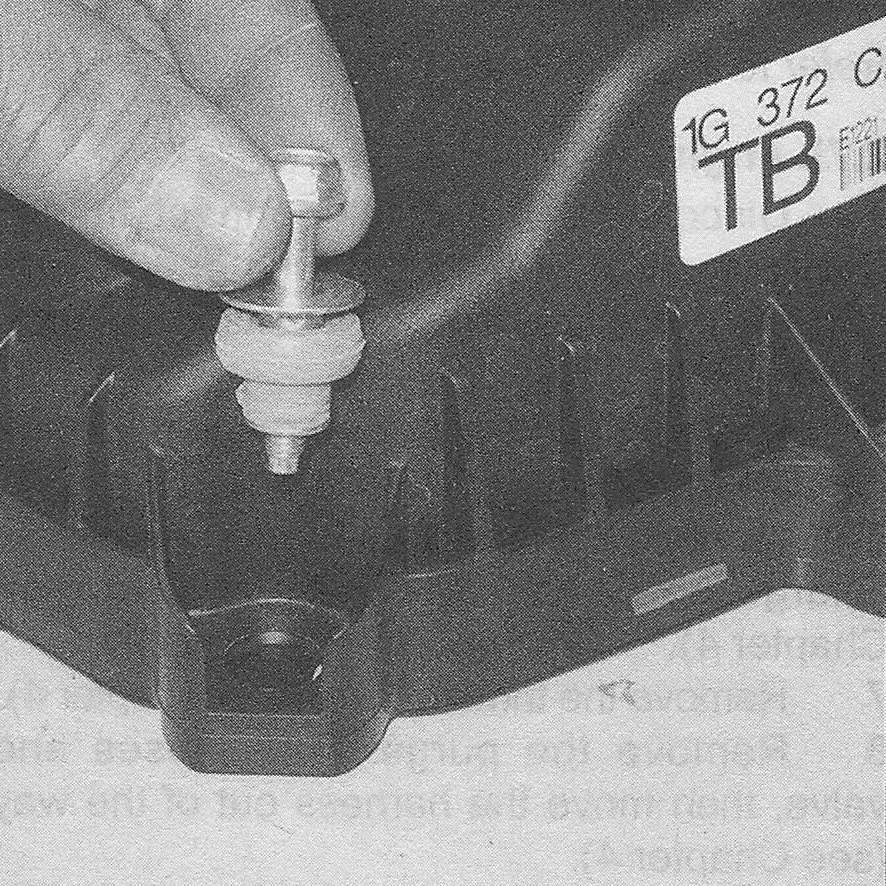
29. Make sure the bolt seals are in good condition (see illustration).
4.29 Check the bolt seals — replace them if they’re not in good condition
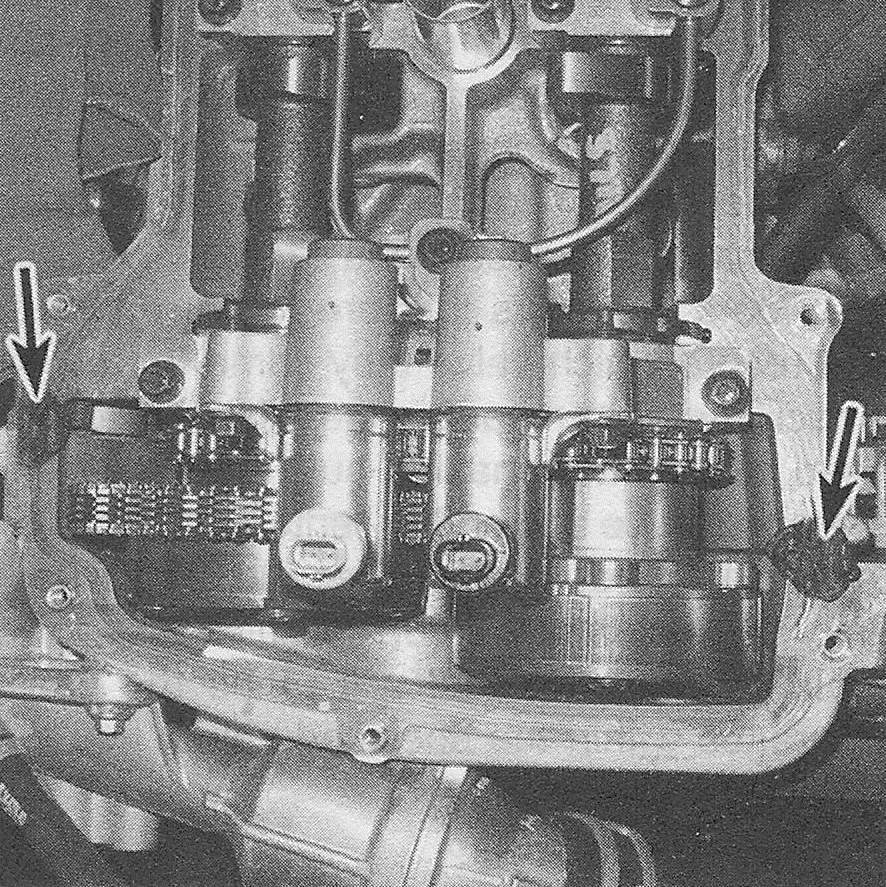
30. Apply a bead of RTV sealant to the joints where the engine front cover meets the cylinder head and install the valve cover within four minutes (see illustration).
4.30 Apply RTV sealant to the seams where the timing chain cover meets the cylinder head
31. Carefully position the cover on the cylinder head and install the bolts.
4.31a Valve cover bolt tightening sequence 2.7L engine ( left side shown, right side similar
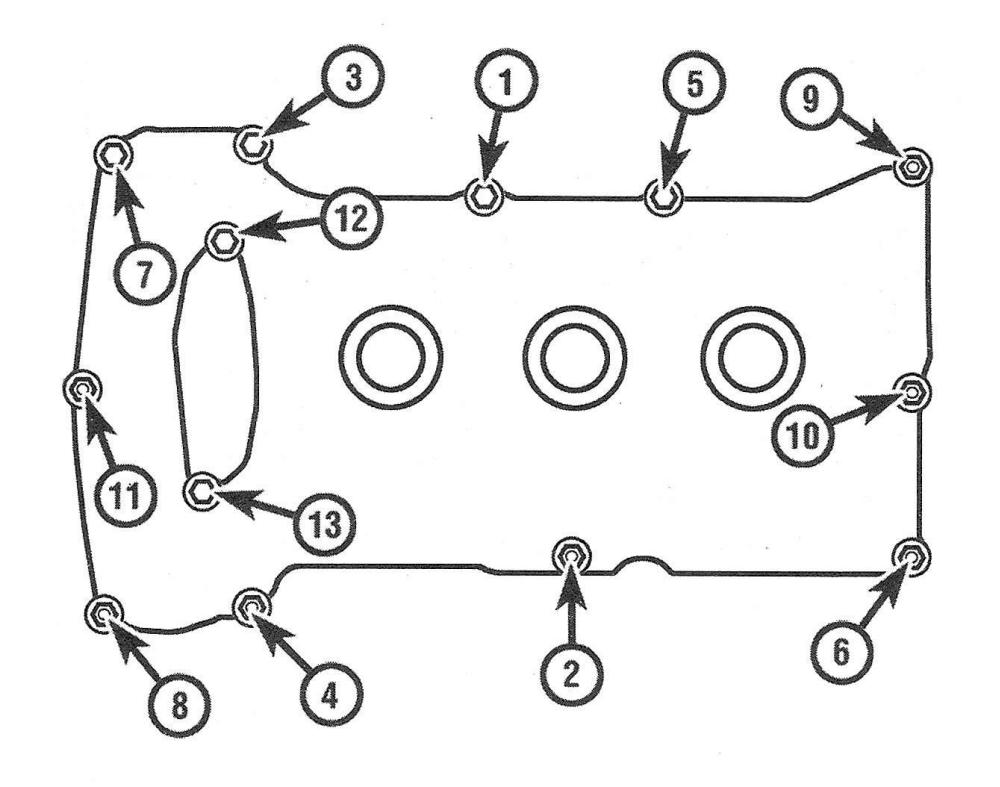
4.31b Valve cover bolt tightening sequence — 3.5L engines ( left side shown, right side similar)
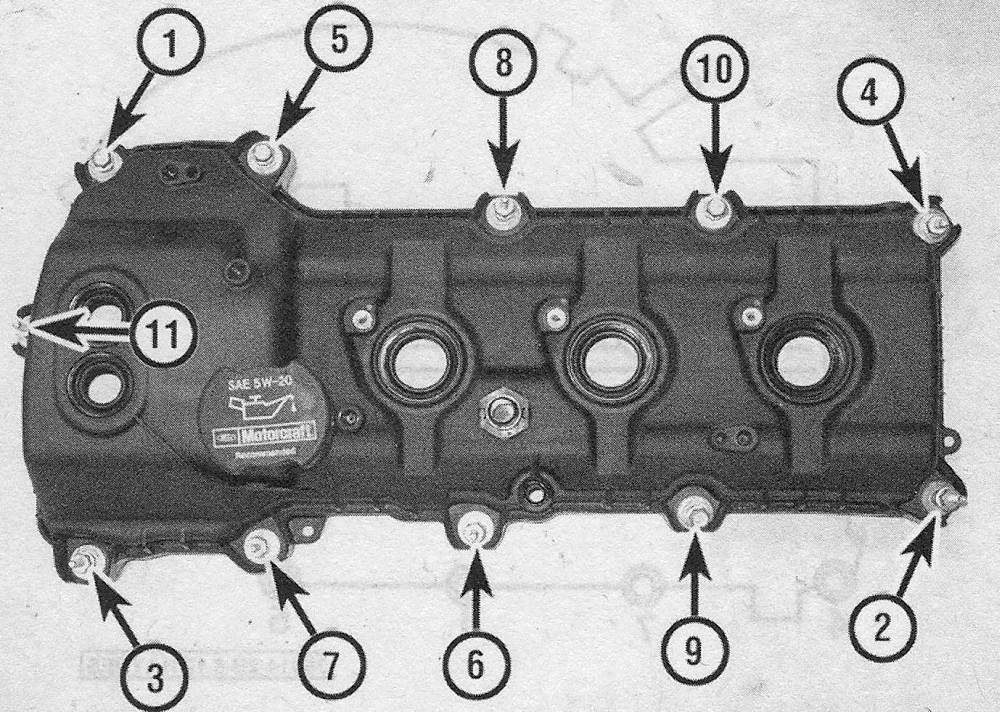
32. Tighten the bolts a little at a time, in the proper sequence (see illustration), to the torque listed in this Chapter’s Specifications.
33. The remainder of installation is the reverse of removal.
34. Start the engine and check carefully for oil leaks as the engine warms up.